
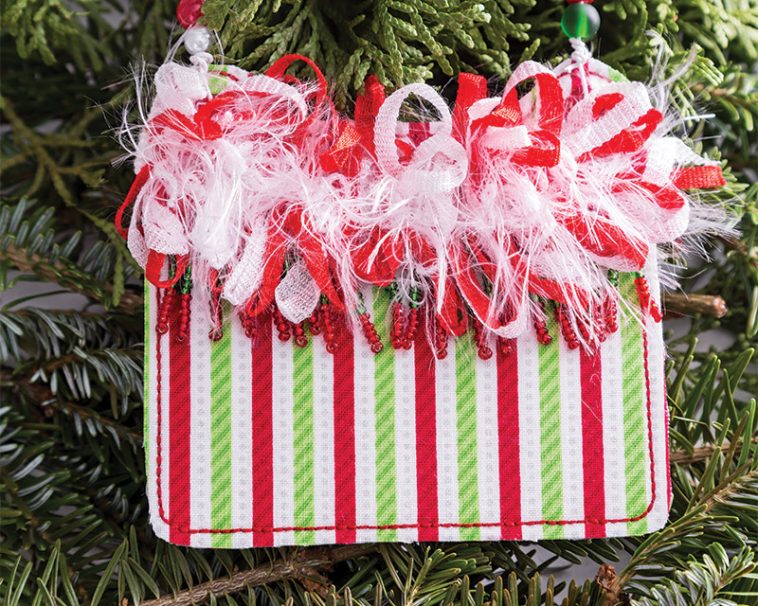
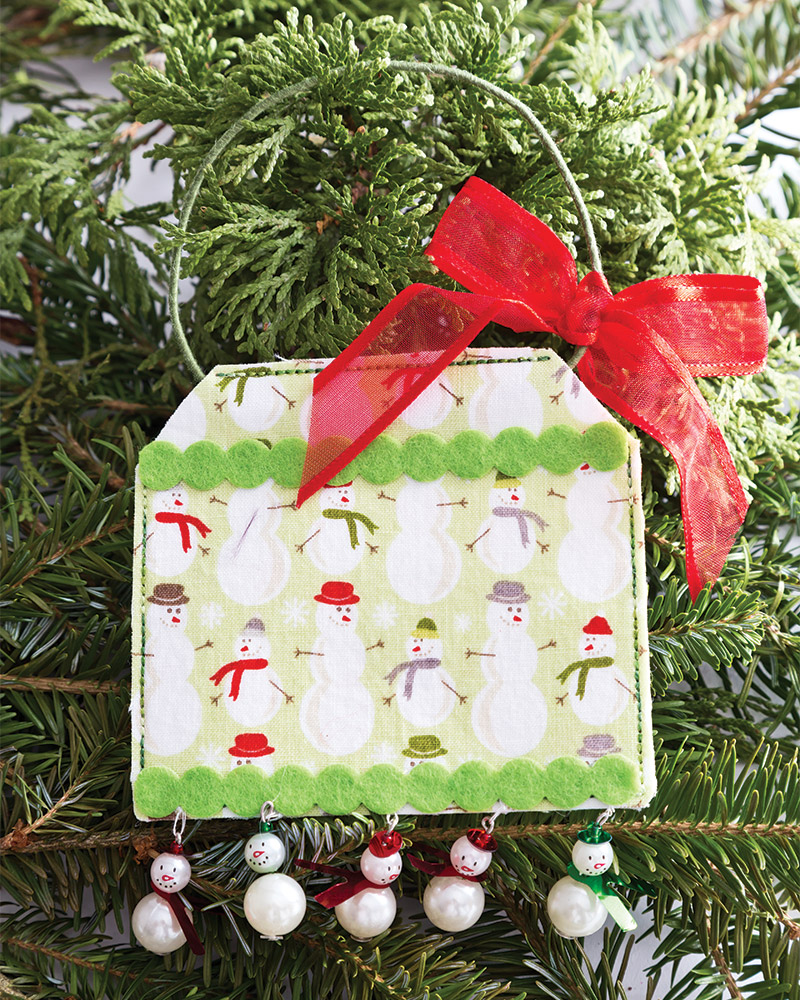
These quick and easy made-in-the-hoop gift card holders are so fun to spiffy up. You can make them cute and clever or elegant bits of art. These crafty card holders make it fun to give the gift that never gets returned and always is appreciated—gift cards!
The free embroidery designs come with the purchase of a Classic Sewing Holiday issue. They can be made into purse-like creations, as they have little eyelets at the top corners to accommodate beaded wire, ribbon, or yarn to create a handle. The flat top holder may be made into a purse as well, but it is also easily transformed into a gender-neutral gift by slipping ribbon in the casing at the top and tying a bow. Or, you can even slip a lollipop stick in the casing—a double treat!
These holders don’t have to be reserved for holiday gifts; they work great for birthday presents too. Pick fabrics that best celebrate the occasion, and then slip an admired treat like a favorite specialty tea, chocolate squares or even little love notes inside.
Designs by Evy Hawkins of A Bit of Stitch
Supplies:
Felt or stabilizer bonded fabrics
Sewing or embroidery thread to match or contrast
Assorted beads, ribbons, buttons, mini-ornaments, trims, etc.
Craft wire
Hot glue and fabric glue
Needle nose pliers and wire cutters

Prepare the fabrics:
Good quality felt will not need to be stabilized. However, if you wish to make your cardholders from fabric, the fabric will need to be bonded to the stabilizer.
At the embroidery machine:
- Hoop one piece of felt OR one piece of stabilized fabric wrong side up in the 4×4 hoop. Thread the machine with matching or slightly contrasting thread in the top and bobbin.
- Sew the first stitch sequence; this is the slot opening that will be on the back of the card holder.
- Place an additional piece of matching felt or stabilized fabric right side up on top of the hooped fabric, centered over the design area. Sew second stitch sequence to sew the two layers together.
Finishing:
- Take the fabric out of the hoop and cut out the holder by trimming a little more than 1/8″ away from the stitching outline.
- Use a seam ripper to open a small place within the slot opening stitching on the back. Then use tiny scissors to cut the slot the rest of the way open. Take care not to cut through the front layer.
Embellishing:
- Now comes the fun part – decorating them! Insert ribbon into the eyelets and tie knots at the ends to secure a quick ribbon handle. Or slip pretty beads on a length of craft wire, insert in the eyelets, and twist above the holder to secure. Plain fabric covered florist wire works great all by itself.
- Use fabric glue to attach any fabric-type trim. Use hot glue to attach other bits such as buttons, faux flowers, etc. The decorating possibilities are pretty much unlimited!
Evy Hawkins delights in creating original and unusual designs, projects, patterns and tutorials for the wonderful world of stitching. She currently travels and teaches throughout the USA, and is a Craftsy teacher. Visit her website to see what’s happening in her studio today!
Get the full instructions in Classic Sewing’s Holiday issue!
Comments 2
These are a cute, rainy-day project! Thanks for the terrific photos and links.
These cards are lovely.
Marilyn